
As your product moves into production, injection molding costs can start to feel like they’re adding up at a rapid pace. Especially if you were prudent in the prototyping stage, drawing on rapid prototyping and 3D printing to manage your costs, it’s natural to feel a bit of “sticker shock” once those production quotes start to surface. From tooling creation to machine setup and production time, the remaining steps in bringing your product to market are likely to represent a large portion of your overall investment.

This is not to say that there aren’t ways to reduce injection molding costs, however. In fact, a number of best practices and tips are available to help you manage your costs with no sacrifice in quality. What’s more, many of these efficiencies dovetail or overlap with design best practices, resulting in a better overall product.
As you look into ways to reduce your injection molding costs, keep a few items in mind:
- Not all of the below will necessarily apply to your project, and other best practices may also be available that aren’t listed here.
- There are two main areas where costs can be reduced: investment costs (such as the production of your mold), and per-part costs (which are discussed in greater depth below).
Read on to learn more:
- Design for efficiency. In this case, we’re talking about production efficiency: making your part as easy as possible to produce, package and fulfill — while minimizing errors. This means following design best practices such as adding appropriate draft (or angle taper) to your parts for easier ejection, rounding corners, keeping walls sufficiently thick, and generally designing your product to take advantage of how the molding process works. With efficient design, your overall cycle times will be shorter, reducing the machine time for which you pay, and your number of discarded parts due to production or ejection error will be lower, saving you wasted time and material.
- Analyze the structural requirements. Before moving to production, it can pay dividends to closely analyze the structure of your part to determine which areas are most critical to its function and quality. When you take this in-depth look, you may find areas where a gusset or a rib provides the strength you need, rather than a completely solid area. These types of design modifications, taken as a whole, can improve the structural integrity of your part while making it easier to produce. Plus, with lower part weights, your finished product will be more cost-efficient to ship, store and fulfill.

- Reduce solid part areas. To further expand on the above concept, reducing solid part areas in favor of more hollow sections with carefully planned and placed supporting elements can yield big dividends to your bottom line. Designing a gusset instead of a solid inner wall, for instance, uses a significantly less amount of resin, adding up to big savings in your upfront material investment. Just be sure that you aren’t sacrificing quality in the interest of material efficiency, or else any potential savings will be wiped out by part failures.
- Use core cavities when possible. When designing hollow box- or cylinder-shaped pieces, mold design and configuration can make a big difference in the efficiency and cost of both mold production and your part production process. For those types of hollow shapes, “core cavity” design provides a smart solution. “Core cavity” means that, instead of creating a mold half with deep, narrow walls to create the hollow portion, the tool is machined around the cavity shape. It’s a much less intricate design with less margin for error, and material flow will be significantly easier during the production process.
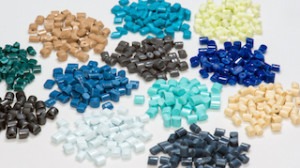
- Suit the material to your part needs. Unless you’re designing a part for use in harsh environments such as extreme hot or cold, or for special-grade uses such as medical or food, material choice is often interchangeable. Rarely will you need to select a “Cadillac”-grade resin for a general-use part; and picking a lower cost material that can still suit your needs is an easy and effective way to lower your overall costs. A simple analysis of use cases for your product, along with quality requirements and your target market, can help you choose the right material for your price point.
- Simplify as much as possible. We mentioned design for production efficiency above, and this is a similar yet distinct point. When simplifying your product design, eliminating any unnecessary elements, you can start to see savings in tooling costs, setup and production efficiency. Embellishments such as engraved or embossed company logos, built-in textures and finishes, and unnecessary design flourishes or elements may appear to make your part stand out, but it’s worth it to question whether the additional production costs are worth it. Especially for commodities, it’s much wiser to focus on quality and efficiency to provide a well-made yet cost-effective product for buyers, rather than attempting to differentiate yourself with design elements that don’t impact part performance.
- Only add processes when needed. Much as textured or otherwise customized part finishes shouldn’t be designed into the mold unless necessary, other finishing processes should also be avoided unless they are integral to the function and purpose of your product. For instance, many resins do not possess an attractive finished color, so you may be tempted to paint or otherwise “dress up” the finished product. Unless aesthetic appearance is a critical quality for your end user, however, the time and cost of this added process is often not worth the investment. The same goes for processes such as sandblasting or other appearance-focused methods.
- Get as many pieces as you can from your tool. Here, we’re talking about lowering your per-part costs, which can help you amortize the cost of your mold across a greater quantity, while driving down your overall investment by creating efficiencies in the production process. When you’re able to create, for instance, a mold with six shots instead of just two shots, you increase your production speed exponentially, create less wear and tear on your mold, and are able to get to market more quickly. In some cases, you may even be able to lower your tooling cost by choosing a more inexpensive material, since with more shots, the mold is undergoing fewer cycles to produce the same quantity of parts.