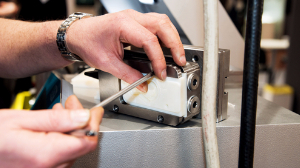
If you’ve never considered optimizing your injection molding process — or if it’s been a while since you’ve done so — it’s something you should consider investing time in now. Why? Put simply, if you haven’t taken proactive steps toward optimizing the molding cycle, it’s almost certainly running sub-optimally — costing you time and money in the process.
An optimized molding cycle can create a more efficient process in several ways:
- Cycle times can be reduced.
- More parts can be produced in the same (or even less) amount of time.
- Machine setting errors may be discovered, which can cut down on material waste.
- Production runs can be completed more quickly, reducing your time to market.
- Less energy may be used (for applications such as mold and material temperatures), creating overhead cost savings.
- Automation may be improved upon review and examination of the plastic molding process.
These are just a few of the ways that optimizing your molding cycle can create real benefits for your business and your product. Next, we’ll take a closer look at how some of those benefits are provided, and then we’ll examine what you can do to easily undertake the optimization process — and make it an ongoing effort.
What Are the Benefits of an Optimized Molding Cycle?
While it’s easy enough to list the benefits of a process, the proof is in the pudding. With that in mind, let’s take a look at exactly how the benefits listed above are achieved with an optimized molding cycle.
Reduced cycle times:
You may be able to reduce cycle times by eliminating excess movement or process in areas such as fill/pack time, hold time and cooling time (even more on these later).
More parts in the same (or less) time:
With shorter cycle times, it stands to reason that production is increased. Keep in mind that reducing cycle times is not a catch-all, blunt-force process or solution. Cycle times should be carefully gauged and adjusted, and can only be reduced to a point before a degradation in quality and part integrity occurs. If those errors accumulate, you’re no longer saving production time — and you’re probably losing money.
Machine setting errors:
In the process of taking a deep dive into process times and other machine settings, you’re naturally fine-tuning and examining everything as you go along. This in-depth look at the cycle can not only help you optimize settings — it may help you spot errors or other areas for improvement that might have been causing part inconsistencies or errors.
Faster time to market:

Faster production (again, within quality standards) means that your parts can get to quality control and validation checks faster, and move to market more quickly.
Lower energy costs:
You might be able to adjust material and mold temperatures if they are being heated beyond what’s necessary to achieve the same level of part quality. If this is the case, your machinery will draw less energy, which can add up to big savings over time.
Improved automation:
Just like other settings and processes, automated elements and settings of your plastic molding process should be reviewed and fine-tuned as needed. With your robotics running as efficiently as possible, the rest of the process will benefit as well.
How to Optimize Your Molding Cycle
Now that you know why to optimize your molding cycle, the logical next step is how you can do it. While you can get as in depth as you choose, it’s relatively simple to get started. Here are a few ways how:
Testing:
Where cycle time is involved, testing is the most reliable (and really, the only acceptable) way to gauge performance and make necessary adjustments. For fill/pack time, for instance, you can adjust the speed with which material is injected into the mold upward until you detect unacceptable levels of part errors (such as short shots due to incomplete fills, or burns due to material not being able to cool sufficiently before contacting the mold).
For hold time, a gate seal test is the best way to determine if you can reduce your current setting. By continually lowering the hold time and weighing each produced part, you can detect the exact time at which gate freeze occurs and material backflows out of the mold. Simply add a second or so back from the time at which this occurs, and you’ve optimized your hold time.
Material knowledge:
Has it been a while since you’ve reviewed the physical properties of the materials you’re using — such as melting and cooling temperatures? If so, perhaps it’s time to look at those specs again. You may find that you’re overheating the material or the mold, and thus expending unnecessary energy and time. Or, you may find that you’re letting parts cool for longer than necessary. Remember that a rated melt temperature is not an absolute minimum. Depending on your mold design, you should also consider factors such as viscosity, which can be affected by material temperature.
Equipment inspection:
 With cooling times, timing isn’t necessarily everything. Inspect your machinery’s ejector pins. Are they damaged or improperly lubricated? Any number of defects or irregularities can not only incrementally increase cycle times (which then adds up), but can also create quality issues — which, again, adds to your overall costs and production time.
Mold mechanism speeds:
Review the speed with which your mold is breaking apart after a cycle, and with which it re-closes. These may be occurring more slowly than necessary — that the utmost priority should be placed on maintaining the mold’s structural integrity and function.
One final point to note: As you adjust machine settings to optimize your molding cycle, it’s usually a good idea to only adjust one setting at a time. That way, if an error occurs, you know exactly what caused it. Making several adjustments at once can create confusion as to which, exactly, led to the error. Also, always adjust settings for testing runs — not production runs. Knowing the reasons to optimize your injection molding cycle — and how to accomplish that — can go a long way toward a streamlined and highly efficient process.


 With cooling times, timing isn’t necessarily everything. Inspect your machinery’s ejector pins. Are they damaged or improperly lubricated? Any number of defects or irregularities can not only incrementally increase cycle times (which then adds up), but can also create quality issues — which, again, adds to your overall costs and production time.