

It’s a pretty awful feeling when, after seeing several defective parts released from a mold, you realize that you’re going to have to halt production and figure out what the problem is. Injection molding defects are certainly not uncommon, but that doesn’t make them any easier to deal with — especially with QA waiting, orders queuing and delivery deadlines looming.
When you think about the injection molding process, it’s probably not that surprising that it’s easy for defects in the finished molded parts to occur. The mold needs to be designed properly — conducive and in the service of the actual process. The proper material must be chosen, taking into account melting and solidifying temperatures, viscosity, hardness and numerous other factors. The process needs to be calibrated correctly, with specific hold times and pressures necessary depending on all the factors above, and more.
Injection molding defects can, broadly speaking, be boiled down to having three root causes: product/mold design, material choice and process calibration. There’s some overlap among each of these, depending on the particular problem and what your options are for rectifying it. For instance, sometimes time or money concerns mean that it’s not feasible to create a brand new mold, so options concerning the material and the process must be more strongly considered. Other times, it is more beneficial in the long run to build the absolute correct mold.
Let’s take a look at which defects you might encounter from each of these root causes, and how you can fix them:
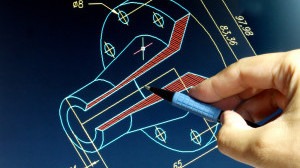
1) Defects from Mold or Product Design
Two of the most common injection molding defects you may encounter due to suboptimal mold or product design (meaning suitability for injection molding, not aesthetic or functional concerns) are:
- • Cavities: Also known as voids or vacuum voids. A cavity is just what it sounds like: an unfilled, empty gap within your part or product (sometimes it may not even be visible). Cavities or voids pose a grave danger to the structural integrity of finished parts.
- • Flow lines: These are discolored striations, which indicate that the melted plastic had difficulty flowing through the mold at a uniform speed, leading to irregularities.
If you’ve worked with injection molding for any amount of time, you’ve likely heard the mantra: “Uniform wall thickness, uniform wall thickness, uniform wall thickness.” Wall thickness differences are a top cause of design-based injection molding defects. However, uniform wall thickness is not always absolutely critical.
If your part requires different wall thicknesses, you may be able to achieve this — provided that you are able to gradually build the changes in thickness into your part design. Subtle shifts in wall thickness help ensure that flow speed doesn’t drastically change as molten plastic material moves in to fill a mold. Uniform or gently graded wall thickness also ensures a more uniform cooling time, meaning that thicker areas won’t take significantly longer to cool than thinner areas — a root cause of cavities or voids.
One final design tip: rounded corners also help ensure uniform filling and flow of the mold cavity, helping to alleviate these problems. Along with “uniform wall thickness,” be sure to memorize “no sharp angles” as well.
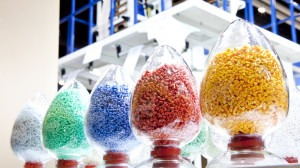
2) Defects Due to Material Choice:
It’s important to understand the characteristics of the material used in your injection molded products — not just for the qualities of the finished product, but also for its qualities during the molding process. Why?
- • Short Shot: Short shot is the biggest injection molding defect caused by improper, erroneous or simply overlooked material selection. Short shot means that there simply wasn’t enough material to completely fill the mold — the “shot,” or initial amount of material that was injected into the mold, came up “short.”
The answer to short shot is a little more in-depth than just “use more material,” and taking that into consideration can help lower your material costs. Short shot can be caused by unexpected shrinkage in the mold, or by a material that was not viscous enough to totally fill all areas of a mold. In both of these cases, looking at the properties of the material you’re using — and what temperature, pressure, cooling time and so on, are required, can help solve the problem without simply throwing more material (and money) at it.
3) Defects Due to Process Calibration
The injection molding process is not identical every time it’s done — far from it. Machines must be set according to a variety of factors: initial material temperature, injection speed, holding time and holding pressure, to name a few. What can happen if these settings are off?
- • Sink Marks or Holes: These are the surface effects of issues on the interior part of your finished product. Sink holes are what occur when the surface of a part caves in to a cavity or void, and sink marks are depressions in the surface of a part caused by internal shrinkage due to varying part cooling times. Rather than completely redesigning your part with more uniform wall thicknesses, sink marks and holes can potentially be corrected by lowering injection temperatures and lengthening cooling times, with the goal of ensuring that different areas of parts remain close in temperature throughout the process
- • Weld Lines: If a mold is designed with two gates and injection points, or in such a way where material from a single injection flows, separates and then rejoins itself at a later point, weld lines are possible. A weld line is a visible dissimilarity between two adjoining areas of a part, caused by differences in flow and cooling time.
- • Burn Marks: A surface irregularity that occurs for exactly the reason you’d expect: the material was heated to too high of a temperature. Burn marks can also occur if air, which will heat much more quickly than the material, gets trapped in a mold, or if the injection speed is too high.
- • Warping: Warping occurs when unexpected or unaccounted for shrinkage happens in different areas of a part, giving it improper appearance and dimensions upon or after release from the mold. In fact, warping can almost always be corrected by lengthening cooling times. With a longer cooling time, the part is kept in a controlled environment longer, and is also more likely to keep its shape.
As you can see, it’s truly important to be vigilant at every step of the process, from design to injection to cooling. With these tips in mind, you’re well equipped to resolve these issues if and when they arise.