Injection molding is one of the most ubiquitous and accessible processes that you can use to manufacture your products. The versatility of injection molding that makes it such a good choice for so many products does not, however, mean that certain design aspects and considerations can get overlooked. In fact, understanding the injection molding process and the qualities of product design that are most suited to it can go a long way toward improving the efficiency of your production runs and the quality of your end products.
Taking just a few minutes to learn (or remind yourself of) some principles of design to incorporate in your injection molding designs is more than worth the effort it can save you in the future. Read below to learn more about injection molding design tips.
1) Don’t forget the necessities of the process. A quick refresher on the injection molding process: Two halves of a mold are hollowed with a negative image of your part. Hot, liquefied plastic or rubber is injected into the mold and allowed to cool. Once the plastic injection mold design is cooled, the two halves of the mold are pulled apart, and the part is released.
From this process, there are a couple of points to remember. As an overview:
- • During the injection process: There must be a location in the mold and on the part for the base material to be injected into. This is called the gate, and it must be removed from the finished part (this can occur automatically or manually). Gate position is important in injection molding design — you will typically want to position the gate at a thicker, intersectional area of your part where it can be removed without concern for the structural integrity of the part. Gate removal will likely also leave a scar — something to consider, because part appearance is a concern.
- • During the cooling process: Your liquefied plastic or rubber material will shrink as it cools and solidifies. Be sure to take that into consideration — not only when laying out part dimensions, but also for design elements like adding radius to corners and deliberating wall thickness.
- • During the part release: When the two halves of the mold are separated, there will always be what’s called a “parting line,” a natural incorporation of the fact that the mold consists of two separate halves. This is different from draft, which is caused by defects in the mold or machine, and cannot be avoided — it is best to design your part to plan for the parting line location.
2) Consider wall thickness. Some shops will tell you that they can only produce injection mold parts with a uniform wall thickness. While this can make it easier to manufacture parts, it is not integral to the process. It is, however, true that different wall thicknesses can make for a more difficult process. This is because of the cooling process mentioned above: thicker wall areas will cool and solidify more slowly than thinner areas. Combined with the shrinkage factor during the cooling process, this means that improperly designed molds and products can be subject to uncooled, still-liquefied substrate running to areas of the part where it should not be located.
Manage this potential problem by designing your part with manufacturability in mind. Thicker areas can, for instance, be located at lower parts of a mold, allowing gravity to help keep still-cooling material where it belongs. Questions? We’re always glad to offer our expertise in designing for manufacture, and can help you build the part you need while allowing for the practicalities of the process.

3) Incorporate draft. When you pop an ice cube out of a tray, you’re seeing the concept of draft at work. Each individual cube cavity in the tray is tapered to allow for a smooth exit process, eliminating the need to try and pry the cube out of the tray. Draft in your injection molded product design serves the same purpose. Adding a few degrees of taper (depending on the material and product design) means that parts will leave the mold much more smoothly, with minimum friction and scraping between the finished, cooled product and the walls of the mold. The surface of your part remains undamaged, and the process moves much more efficiently.
4) Build in texture. Rather than adding a second finishing process after injection molding to create texture on your product, you can incorporate the desired finish, pattern or texture right into the mold. By etching or milling the mold to create a finish, you gain a much greater degree of control and uniformity over the look and feel of your part, which saves some time and money by incorporating two processes into one.

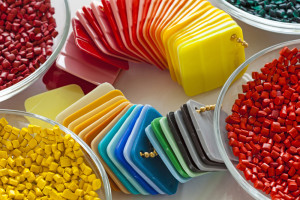
5) Know your materials. This tip really plays into most of what has been covered already in this piece, but it’s important to remember: Material selection is one of the most critical considerations in designing your piece — it factors into many aspects of the process, including shrinkage factor, cooling time, flexibility and more. Different materials can have different minimum and maximum wall thicknesses, for instance, or can require different degrees of draft.
We at RevPart are experts in a number of materials, including ABS, acrylic, HDPE, LDPE, polypropylene and many, many more. We can help you choose the right material for your part while incorporating those material properties into your design. If you still have questions on designing for injection molding, contact us or download our in-depth Injection “Molding Design Guide” for more valuable information.


