

Whenever I begin a new project, I want to know all of the steps up front. I like research; I don’t like surprises.
And I’m like that even with something fairly low commitment, like an inexpensive craft project, so I understand the compulsion to over-research on bigger projects—such as taking on a new business venture.
If you decide to pursue your invention idea, you’ll need to know all the steps of manufacturing before you begin so you can avoid making any costly mistakes.
1. Come up with an idea
You’ve probably already completed this step if you’re reading this post, but it’s worth starting at the beginning.
What exactly is your idea? Can you really, fully explain it? The idea needs to be clear enough for you to understand perfectly how it works—otherwise you’ll never be able to move on with the process.
Once you start to get a handle on it, try to sketch it out. Really get the details solidified in your mind.
You might start realizing that you have some details that don’t quite work, and that’s totally fine. You have plenty of time to re-sketch and figure everything out before moving on.
You also need to spend some time here thinking about your plan for selling your product. You don’t need to come up with a business plan (yet), you just need to know who your ideal customer is and where in the market you fit. You should also think about how you want to raise the funds: investors, crowdfunding, or putting up the funds yourself. This information will help you decide how to proceed through the next steps and ensure you’re not wasting your time.
You should also make sure that you can actually turn a profit with your idea. Manufacturing can be a long, expensive process, and you don’t want to waste your time or your money.
2. Test at home
Show off your idea to family and friends to get feedback. They may have valuable insight into your invention that can help improve it.
Don’t let them just tell you what you want to hear, though… that won’t help you at all. You need actual constructive criticism.
After you get some feedback, make appropriate changes to your idea. Use the user feedback to make your product even better…then show your new, improved idea off again.
3. Have your idea made into CAD files
Once you’re pretty happy with your idea, the next step is to have your sketches transformed into 3D drawings so you can get prototypes made.
If you have a very simple idea or experience with CAD programs, you might be able to do this step yourself. Otherwise you’ll need to hire someone.
A drafter might be able to do a more simple drawing, but an engineer will be needed for a more complex item, like something with electrical components, because they have the skill and experience required.
If you need a rendering for some reason, maybe to show early investors, you’ll need to contact an industrial designer. Renderings are very different from your CAD files though, so they’ll come from different people if not completely different companies.
As the engineer is making your drawings, you might find that he or she has some suggestions for improvement. These tweaks will focus on making improvements for structural integrity and ease of manufacturing. You can talk these ideas out with the engineer as you move along in the process.
If you’re concerned about protecting your intellectual property, you might want to file for a provisional patent during this step. You’ll be able to inexpensively protect your design, add a “patent pending” logo, and be safe for twelve months. After that initial period is over, you can file for a non-provisional patent with your updated and completed drawings. You can read about provisional patents or about the pros and cons of patenting.
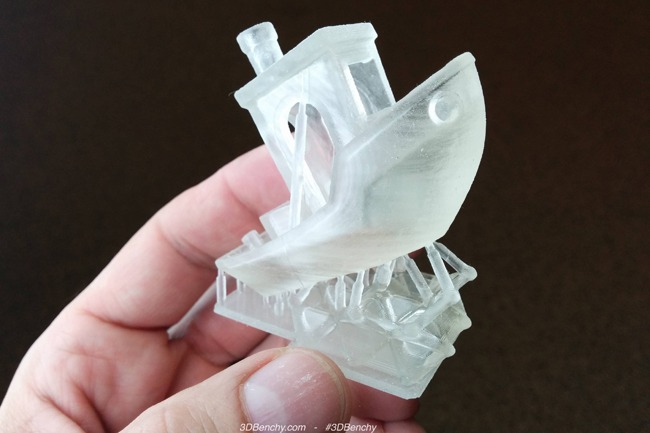
4. Have your product prototyped
You may want to get just one or two items 3D printed or, depending on your item, CNC machined to start this process. This is a pretty inexpensive first step to make sure that your physical product lives up to your expectations. This also gives you a chance to make more changes before committing to full scale production.
You can also take these prototypes to show off your product to your friends, family, and potential investors.
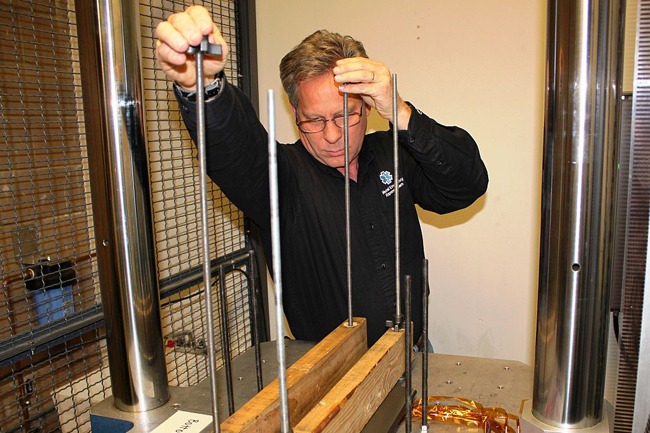
5. Product testing and UL certification
Does your part include electronics? Could it hurt someone if it fails? Is it some kind of appliance? If so, you likely need certification.
UL (Underwriter Laboratories) is a testing organization in the US that looks at product to see if they meet minimum standards.
Although this is an expensive step, it might be a requirement depending on your market or distributor. It will help to call the UL office with some clearly defined questions to help you make good design decisions that will save you time and money later.
6. Manufacturing
Once you’ve come up with the perfected design and you’ve thought of a plan to distribute your product, it’s time to move forward with production.
The most common method of manufacturing plastic parts is injection molding, and you’ll need substantial upfront money to have the mold created, so it might be good to run a crowdfunding campaign to raise the funds if you don’t have spare money or an angel investor.
You also need to know where you’ll be distributing your product. Are you going to house the items in the garage and sell them online, filling the orders yourself? Do you have stores set up to be distributors? Kickstarter backers who are impatiently waiting for their prizes?
You should also file for your patent now if you want one and haven’t filed yet.

7. Distribution
If you’re running a crowdfunding campaign, your first responsibility is to your backers…but what will you do after that?
If you want to sell to stores, you’ll have to put some effort into it. You’ll have to network with the store managers where you want to sell your item sold. Find out who the regional and national buyers are because you’ll have to send them samples of your product with a media kit to persuade them to buy from you.
You can also look at smaller independent stores (as opposed to, say, Walmart) for distribution. You can read more about getting your product into stores in our blog post.
8. Grow your business
After you get your product into stores, you’ll enter what’s called the growth phase. This is when your sales grow and you begin scaling up production to distribute to more stores.
When your profits peak, you’ll reach the maturation phase. This is the last phase before sales decline. It’s about this time that you need to start focusing on the next product you want to make.
9. Improve your idea and update your product
This “completes” the lifecycle by starting it over. You can release a version 2.0 of your product or start creating a new one if you’re feeling brave.
What phase are you in? What Advice would you give someone just starting out?